
Learning how to read greens for putting is part art, part science. It’s about training your eyes—and your feet—to see the subtle story the putting surface is telling you. Get this right, and you’ll start turning those frustrating three-putts into tap-in pars or better. Honestly, it’s the fastest way to slash strokes off your score.
Why Reading Greens Is the Key to Fewer Putts in Golf
We’ve all been there. You hit a putt that feels perfect off the face, only to watch it mysteriously veer off-line just as it loses steam. That’s not a bad stroke; that’s a bad read.
Putting accounts for roughly 40% of all strokes in an average round of golf, yet most amateurs barely give it a second thought in their practice sessions. If you’re serious about shooting lower scores, mastering the art of green reading is where you’ll see the biggest and fastest improvements.
Forget the vague tips you’ve heard before. We’re going to break down a practical, repeatable process that separates the great putters from the merely good ones. This isn’t some mystical talent you’re born with—it’s a skill you can learn.
The Foundation of Confident Putting in Golf
Before we get into the “how,” we need to understand the “what.” What forces are actually acting on your golf ball from the moment it leaves the putter? It all boils down to a few key ingredients that create the ball’s path to the hole.
- Slope: This is the big one. The tilt of the green is the primary force that dictates both the direction and the severity of the break.
- Speed: The pace of your putt has a massive influence on how much the slope will affect the ball. A firm putt breaks less than a soft, dying putt.
- Grain: This is more subtle, but the direction the grass is growing can push your ball slightly and change its speed, especially on slower greens.
Think of it like this: a successful putt is a perfect marriage of line and speed. Get the speed right but start it on the wrong line, and you’ll miss. Nail the line but hit it with the wrong pace, and you’ll miss that one, too. Reading the green is simply the process of figuring out that correct starting line.
“The difference between guys who putt with confidence and those who are scared of their own shadow isn’t how many they make—it’s what happens after they miss one. Confident putters have this weird ability to forget their bad putts while remembering every good roll they’ve ever had.”
This guide will give you a framework to analyze these factors every single time you step onto a green. You’ll learn how to build a pre-putt routine you can trust, start believing what your senses are telling you, and finally roll the rock with some real conviction. Let’s get to it.
Building Your Golf Pre-Putt Green Reading Routine
A confident putting stroke is born from a confident read. Let’s get one thing straight: great putters don’t just guess the right line. They follow a systematic process, gathering crucial information from the moment their feet touch the green. This isn’t about superstition or slowing down play—it’s about building a solid case for the line you’re about to take, piece by piece. When you finally stand over the ball, there should be no room left for doubt.
Your green reading routine actually starts the second you begin walking toward your ball. This is your first and best chance to see the “big picture.” Too many golfers wait until they’re standing right behind their ball to start analyzing the putt, but by then, you’ve already missed the most obvious clues.
As you approach, just keep your eyes open. Is the whole green tilted one way? Most greens are designed to shed water, so look for the general direction of drainage. This overarching slope will influence your putt, even if smaller, subtle breaks exist closer to the hole.
Start With The Big Picture View
That first walk-up is like looking at a topographical map from a distance. You’re not worried about the tiny details yet; you’re just identifying the major landforms.
Ask yourself a few simple questions:
- Where’s the highest point on this green?
- Where are the lowest points or collection areas?
- If I poured a bucket of water right here, where would it all flow?
Getting this macro-level understanding gives you a baseline for what the ball will naturally want to do. For example, if you know the entire green slopes from back to front, you can anticipate that even a putt that looks straight will have a tendency to drift downhill.
Once you have this general feel, you can start to narrow your focus down to the specific path from your ball to the hole.
This three-step process—analyzing the situation, trusting your read, and scoring—is captured perfectly in the infographic below.
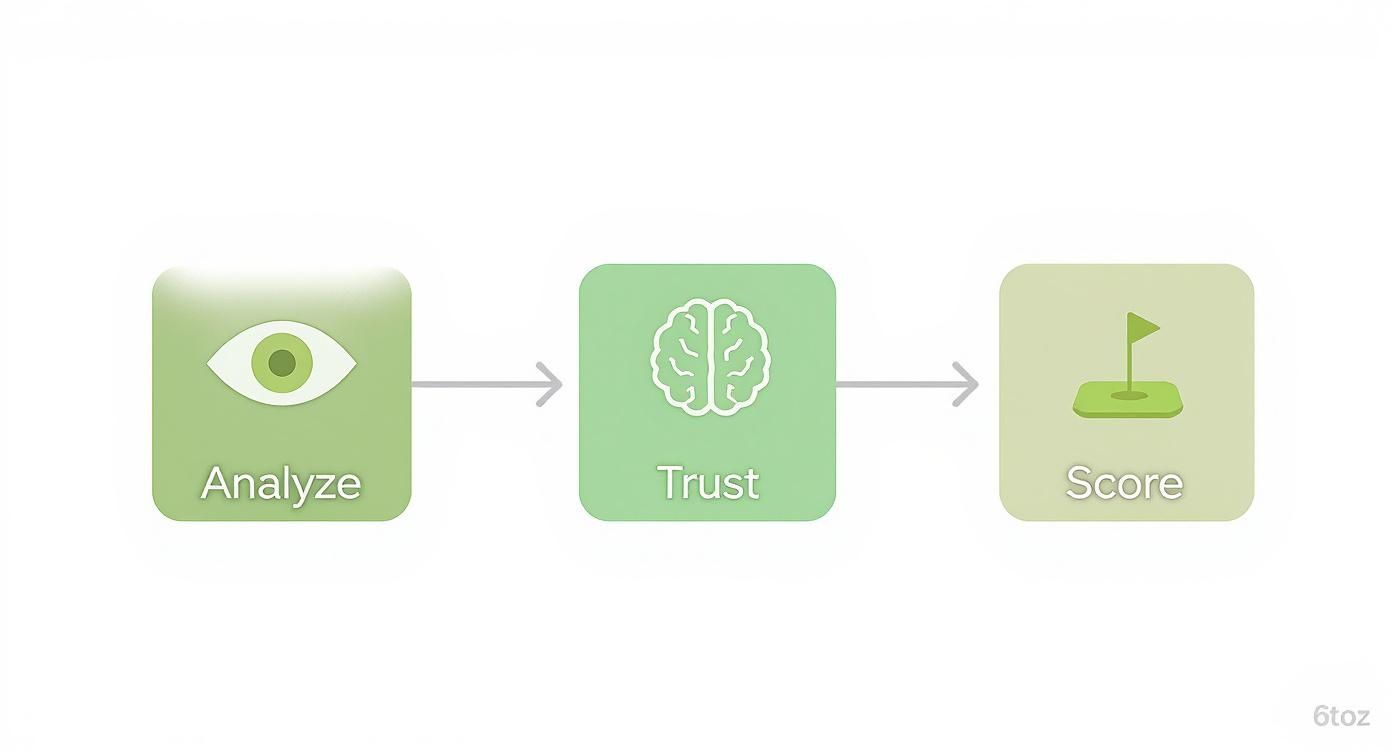
This simple flow shows that successful putting isn’t just a physical act. It’s a mental process that moves from observation to commitment and, finally, to execution.
Feel The Break With Your Feet
Your eyes can play tricks on you out here, but your feet rarely lie. The human body has an incredible ability to sense balance and detect even the slightest slopes. As you walk behind the hole to see the putt from the other side, pay close attention to the feeling in your feet.
Can you feel a distinct pressure on one side of your feet? If you’re walking on a side-hill lie, you’ll naturally feel more weight on your downhill foot. This physical feedback is an amazing way to confirm (or challenge) what your eyes are telling you about the slope. I know plenty of great putters who trust their feet more than their eyes.
A “made” putt comes down to three things: a clean, end-over-end roll; starting it on your intended line; and hitting it with the pace you visualized. If you check those boxes—even if it doesn’t fall—you’ve done your job.
That perspective is everything. Your pre-putt routine is about giving yourself the best possible chance to accomplish those 3 things. It’s about controlling the process, not just obsessing over the outcome. This is a core part of cultivating a golfer’s mindset that separates amateurs from pros.
Use Your Putter As a Reference Tool
Once you have a good sense of the overall slope, your putter can help you get a more precise read. A popular technique is to stand behind your ball and use your putter as a plumb line by letting the shaft hang freely.
Close one eye and align the shaft with the center of the ball. Now, look at how the hole appears relative to that true vertical line.
- If the hole appears to the left of the hanging shaft, the putt will break from right to left.
- If the hole appears to the right of the shaft, the putt will break from left to right.
This little trick helps remove visual bias and gives you an objective reference point. It’s especially useful on those tricky putts where you just can’t quite tell which way it’s going to break.
Find Clues Around The Cup on The Golf Course
The area immediately around the hole is a goldmine of information. Old ball marks and the condition of the cup’s edge tell a story about how previous putts have behaved.
Look closely at the turf. You’ll often see that one side of the cup has a slightly worn or frayed edge. This is the “low side,” where gravity has pulled most of the putts that have missed. If the edge looks beat up at the 4 o’clock position, it’s a huge clue that most putts are breaking from left to right. This is valuable, real-time data that can confirm the break you’ve already identified.
By combining these different sources of information—the big picture, the feel in your feet, a vertical reference, and clues around the hole—you build a complete and reliable read. This systematic approach gets rid of the guesswork and replaces it with a confident plan, letting you step up to the ball and make a committed stroke.
Decoding Slope to Predict the Perfect Line in Golf
If a putt breaks, the slope is the reason. It’s the invisible force that pulls your ball off a straight line and into a sweeping curve. Learning to read that slope isn’t some dark art; it’s a skill you build by training your eyes and feet to perceive what’s really there. The goal is simple: demystify the break before you even take your stance.

Every breaking putt has a high point and a low point. Your first job is to find them. The high point is the side of the hole where the ground is elevated, and the low point is where gravity is dying to pull everything. Once you’ve identified that, you can start to visualize the ball’s true path—a gentle arc from high to low.
I’ve always found it helpful to imagine pouring a slow stream of water where my ball sits. Which way would it trickle? That path is the break line, the natural route gravity wants the ball to take. Don’t overcomplicate it.
Seeing the Apex of the Break in Golf
The most critical part of reading any breaking putt is identifying the apex—the highest point of the curve on your putting line. This is your real aim point, not the hole. For a right-to-left putt, the apex will be somewhere to the right of the cup. For a left-to-righter, it’s out to the left.
The speed you hit the putt with determines exactly where this apex is.
- A firm, fast putt takes less break, so its apex will be closer to the hole.
- A soft, slow putt is much more susceptible to gravity, which means its apex will be much further outside the hole.
This relationship is why just “reading the green” isn’t enough. You have to marry that read to a specific speed. The most common amateur mistake is picking the right line but then hitting the putt with a pace that doesn’t match, causing it to miss low every single time.
The definition of a good putt is simple: you love the way it left the putter. If you hit it with the speed you intended and started it on the line you chose, you’ve done your job, regardless of the outcome.
Committing to an aim point well outside the cup feels completely unnatural at first. It requires trust. Your brain will scream at you that you’re aiming way off, but you have to develop the conviction to start the ball on a line that looks “wrong” to make it right.
From Simple Slopes to Complex Contours
Not all putts are created equal. Some follow a single, predictable curve, while others navigate much more complex terrain. Knowing the difference is a huge part of learning how to read greens for putting like a pro.
Single-Breaking Putts
These are your bread-and-butter putts. The green slopes consistently in one direction between your ball and the hole. The challenge here is judging the severity of that slope to determine just how much break to play.
Double-Breaking Putts
These are the real head-scratchers. The putt breaks one way at the start, then switches direction as it gets closer to the hole. A classic example is a putt that runs through a “saddle” or “valley” in the green. To read a double-breaker, you have to figure out which slope will have the most influence. As a rule of thumb, the slope that affects the ball as it’s losing speed near the hole will be the dominant one.
Green-reading techniques have come a long way. Pros used to rely on meticulously charted yardage books to map out every contour. But the PGA Tour banned these books starting January 1, 2022, forcing a return to more traditional, instinctual green-reading skills. This rule shift really highlights the importance of developing your own eye for the slope. You can explore more about these changes and their effect on professional golf.
Using Visual Cues to Uncover Hidden Breaks
Sometimes the slope is so subtle it’s almost impossible to see. When that happens, you have to lean on other visual cues to reveal the green’s hidden contours.
- Shadows and Light: Early in the morning or late in the afternoon, long shadows can seriously exaggerate the undulations on a green. Use this to your advantage. A shadow stretching across your line can make a tiny ridge or dip pop.
- Grass Texture and Color: From behind the ball, take a look at the overall color of the grass between you and the hole. A downhill slope will often appear slightly shinier or lighter because you’re seeing the grass “with the grain.” An uphill slope might look darker as you’re looking “into the grain.”
Ultimately, decoding slope is about gathering evidence. You use your feet to feel the tilt, your eyes to see the high and low points, and visual aids like shadows to confirm what you’re feeling. By combining all these elements, you build a strong case for your chosen line, allowing you to make a confident stroke built on solid analysis, not hopeful guesswork.
How Grain and Speed Influence Every Putt in Golf
Even if you’ve nailed the perfect read on the slope, your putt can still be derailed by two invisible forces: grain and speed. I like to think of the slope as the highway your ball is traveling on. Grain is like a headwind or tailwind, and speed is how hard you’re pressing the gas pedal. Get one wrong, and even a beautifully struck putt can end up way off line.

So, what is grain? It’s simply the direction the blades of grass are growing. It’s a huge factor on Bermuda and other warm-weather grasses, acting like a tiny rudder that influences your ball’s speed and break from the second it leaves the putter.
Demystifying Grain On The Green
Learning to spot grain is a massive unlock for your green-reading skills. Thankfully, once you know what to look for, the grass gives you some pretty obvious clues.
- Shiny vs. Dull: Stand behind your ball and look towards the hole. If the grass has a silvery sheen to it, the grain is growing away from you. That’s a down-grain putt. If it looks dark, dull, and almost bruised, the grain is growing toward you, meaning you’re putting into-the-grain.
- The Cup Tells a Story: This is my favorite trick. Take a peek at the edge of the cup. One side will almost always look a little ragged, frayed, or “burnt.” That’s the direction the grain is growing. It’s a foolproof signpost pointing you where you need to go.
Putting down-grain (with the direction of growth) speeds your putt up and reduces the break. Putting into-the-grain (against the growth) does the opposite—it slows the putt down and makes it break more as the grass grabs at the ball.
Let’s break down how the grain impacts your roll.
How Grain Direction Affects Your Putt
| Grain Direction | Effect on Speed | Effect on Break |
|---|---|---|
| Into the Grain | Slower | More |
| Down Grain | Faster | Less |
| Across the Grain | Moderate | More pronounced |
Understanding this table is key. When you’re putting across a side slope, for example, the grain will either hold the ball up against the hill or pull it down even faster.
Grain is the ultimate tie-breaker on a tricky read. If you’re torn between two lines, factoring in the grain will almost always point you in the right direction. It’s a subtle influence, but on a putt that’s losing speed, it can be the difference between a tap-in and a five-footer coming back.
The Critical Role of Putting Speed
Speed is the other half of this puzzle, and it’s the one part you have total control over. Here’s a fundamental truth every good putter knows: the speed you hit the ball dictates the line you must take. A firmly struck putt will hold its line longer and fight the slope, while a softly hit putt will give in to gravity much earlier and break a ton.
This is why “lag putting” is such a crucial skill. On those long putts, the goal isn’t just to make it; it’s to roll it with a pace that leaves you a stress-free tap-in. You shift your focus from holing out to mastering distance control—the foundation for eliminating those scorecard-wrecking three-putts.
The need for speed control has only gotten more intense as courses have evolved. In 1977, the greens at Augusta National were running at a leisurely 7 feet 11 inches on the Stimpmeter. Today, tour greens often exceed 12 feet. Those faster speeds magnify every little contour, making a precise read of both slope and pace absolutely essential. You can dive deeper into historical green speeds and their impact on putting to see just how much the game has changed.
Marrying Speed to Your Read
So, how do you put this all together on the course? It starts with a decision. On any breaking putt, you’ve got two main ways to get the ball into the hole.
- The “Firm” Approach: Hit the putt with more pace and play less break. The ball charges into the cup on the high side. This is great for short putts where you want to “take the break out of it,” but it makes the hole feel smaller and can leave a nasty comebacker if you miss.
- The “Dying” Approach: Play more break and hit the putt with a softer speed, intending for it to just tumble into the cup as it runs out of steam. This “dying pace” uses the entire width of the hole, effectively giving you a larger target. For most breaking putts outside of six feet, this gives you the best statistical chance of making it.
The secret is to choose your speed before you finalize your line. Visualize the ball’s entire journey, seeing it track along your chosen path and drop into the cup at your chosen pace. This mental rehearsal connects your read to your stroke, giving you the commitment you need to roll the ball with confidence. Once you master both grain and speed, you’re not just reading putts anymore—you’re truly understanding them.
Practical Drills to Sharpen Your Green Reading Skills
Knowing how to read greens is one thing. Actually executing a putt based on that read? That’s a completely different ball game. You can have all the theory in the world, but it’s deliberate, focused practice that truly trains your eyes and builds real confidence.
Turning aimless putting sessions into targeted skill-building is the fastest way to slash strokes off your scorecard. The secret is using drills that isolate each component of green reading: distance control, break analysis, and starting the ball on your chosen line.
Let’s walk through a few simple but incredibly powerful exercises to make your time on the practice green count.
The Ladder Drill For Unbeatable Distance Control in Golf
If you take away one thing, let it be this: speed is everything. A perfect read is completely wasted if you can’t control your distance. The Ladder Drill is the gold standard for developing a rock-solid feel for pace.
Here’s the simple setup:
- Find a fairly flat part of the practice green.
- Place one ball at your starting spot. Then, set up three more balls in a straight line, each about three feet further from you than the last, creating a “ladder.”
- Your goal is simple: putt each ball so it rolls just past the previous one. Aim for the first putt to go about 15 feet, the second 18 feet, the third 21 feet, and the last one 24 feet.
You’re not trying to hole anything here. The entire point is to calibrate your stroke length and tempo to create tiny, intentional changes in distance. This drill forces you to connect a specific feel with a specific result—the very essence of great speed control. Consistent distance control is a non-negotiable part of a solid short game, and you can see how it fits into the bigger picture in our guide to chipping and putting techniques.
The Clock Drill To Master Breaking Putts
Once your speed is dialed in, it’s time to tackle those nervy, short-breaking putts. The Clock Drill is a phenomenal confidence-builder for anything inside six feet, forcing you to read and hole putts from every angle imaginable.
Just place four to six golf balls in a circle around the hole, about three or four feet out, like numbers on a clock face. Your job is to work your way around the circle, sinking each one. You’ll face uphillers, downhillers, and sidehill putts—all from the same short distance.
This drill hammers home a crucial lesson: even a three-foot putt can have a ton of break. It trains your eyes to spot those subtle slopes and, more importantly, forces you to commit to starting the ball outside the cup on breaking putts.
Nailing these consistently builds a reserve of confidence you’ll take with you straight to the course.
The Gate Drill For A Pure Starting Line
The final piece of the puzzle is trusting your read. It’s one thing to see the line, but it’s another to start the ball exactly where you’re aiming. A misread is forgivable, but a poor start negates even the most brilliant read. The Gate Drill is the perfect feedback tool to ensure your ball starts on its line, every time.
- Setup: Find a straight putt of about six to eight feet. Place two tees in the ground a foot or so in front of your ball, creating a “gate” just a little wider than your putter head.
- Execution: Your only mission is to roll the ball cleanly through that gate.
This drill provides immediate, undeniable feedback. If you can send the ball through the tees consistently, you know you’re starting it on your intended line. That builds the kind of trust you need to aim at an apex point three feet outside the hole and know, without a doubt, that you can hit your spot.
This kind of focused, data-driven practice is more accessible than ever. The explosion of off-course golf experiences, like indoor simulators, has introduced millions of new players to the game. These high-tech spots can show you the exact path a putt will take, letting you learn how slope and speed interact in a controlled setting. This exposure has helped fuel a 25% increase in women playing golf and a 27% increase in non-white players over the past five years, making the game more diverse than ever.
By working these three drills into your regular routine, you’ll stop just rolling putts and start building the individual skills that add up to becoming a seriously great putter.
Understanding how to read greens for putting correctly can significantly improve your game.
FAQ’s
Even the best green reading routine can leave you scratching your head in certain situations. It happens to all of us. Let’s tackle a few of the most common questions I hear from golfers about reading greens, so you can step up to your next putt with total confidence.
Here are a few on-course scenarios and some straightforward advice to handle them.
How Much Break Should I Actually Play for This Slope?
This is the million-dollar question, isn’t it? The honest answer is there’s no magic number. The amount of break is a delicate dance between the slope you see and the speed you choose to hit the putt.
A putt that’s just trickling toward the hole will take a massive amount of break compared to one hit firmly on the same line. The key is to stop guessing and start calibrating.
The best place to do this is the practice green before your round.
Find a 10-foot putt that has a clear, consistent slope.
Hit a few putts at different speeds. Really notice how the break changes.
See how far outside the cup you have to start a “dying” pace putt for it to drop in. Make a mental snapshot of that.
This isn’t about finding a formula; it’s about building an internal database. You’re replacing pure guesswork with an educated read based on what you’ve actually seen, which is how you learn to trust your eyes on the course.
I Totally Misread That Putt. What Now?
First off, a misread is just data—it’s not a failure. When the putt doesn’t go in, the absolute worst thing you can do is turn away in disgust. Stay and watch the ball’s entire journey, especially how it rolls past the hole.
Ask yourself two quick questions:
Did that break way more or way less than I thought?
Was that green faster or slower than I expected?
That immediate feedback is pure gold for the rest of your round. The most common amateur mistake is ignoring this information and just getting angry. A close second is getting to the ball, making a good read, and then changing your mind at the last second. Always trust your first read and use every putt—good or bad—to sharpen your instincts for the next one.
How Does Rain Change How I Should Read the Green?
Moisture throws a wrench in the whole green reading process. Wet greens are always slower, which has a two-part effect on your putt: you have to hit it harder, and because of that, the ball will break less.
Think of it this way: on a damp green, the ball tends to “skid” a little more at the start instead of immediately grabbing the turf and rolling. Gravity just doesn’t have as much time to pull the ball sideways. This means you need to play less break than you would on a dry, fast green.
The opposite is also true. As those same greens dry out in the sun and get faster, the slope’s influence becomes much stronger. That’s when you need a lighter touch on your speed and a more generous read on the break. Being a great green reader is all about adapting to what the course gives you on any given day.
At Golf Inquirer, we know it’s these little details that separate good golfers from great ones. Our goal is to give you the kind of insights that not only help you score better but also let you enjoy the game more. To keep learning, explore more tips and guides at https://golfinquirer.com.