
A pure iron strike—that crisp, compressed feeling—is born long before you even take the club back. The entire Golf Iron swing starts from the ground up, with a solid setup paving the way for a powerful, consistent motion. It’s all about finding that athletic posture, a tension-free grip that gives you full control, and the right ball position for the specific iron in your hands.
When these foundational pieces fall into place, you’re not just getting ready to hit a ball; you’re creating a stable platform. This is what allows your body to rotate freely and deliver the clubhead squarely to the back of the ball, shot after shot.
Understanding the dynamics of the Golf Iron swing can greatly enhance your performance on the course.
A pure iron strike—that crisp, compressed feeling—is born long before you even take the club back. The entire swing starts from the ground up, with a solid setup paving the way for a powerful, consistent motion. It’s all about finding that athletic posture, a tension-free grip that gives you full control, and the right ball position for the specific iron in your hands.
When these foundational pieces fall into place, you’re not just getting ready to hit a ball; you’re creating a stable platform. This is what allows your body to rotate freely and deliver the clubhead squarely to the back of the ball, shot after shot.
Building Your Foundation for a Pure Iron Strike in Golf

So many golfers get obsessed with fixing their swing mid-motion, but from my experience, a huge percentage of swing flaws begin right at address. If your setup is off, you’re forced to make compensations from that point on. Think of it like building a house on a crooked foundation—the whole structure is bound to be unstable.
It’s no surprise the global golf equipment market is booming, valued at USD 8.24 billion and on track to hit USD 12.78 billion by 2032. Irons make up the biggest slice of that pie at 38.84% of the market’s revenue. That’s a lot of golfers searching for better gear to find consistency. You can find more data on this trend over at Introspective Market Research. But here’s the truth: new clubs won’t fix a bad setup.
Mastering the Grip and Stance in Golf
Your grip is your only connection to the club, making it non-negotiable. You’re looking for a neutral grip, one where the “V’s” created by your thumb and index finger on both hands point up toward your right shoulder (if you’re a righty). This gives you total control over the clubface without squeezing the life out of the handle—a major speed killer.
Now, let’s talk stance and ball position. This isn’t a “one-size-fits-all” deal. You have to adapt them to the iron you’re holding.
- Short Irons (PW, 9, 8): Position the ball right in the middle of your stance. Keep your feet about shoulder-width apart. This setup helps you create a steeper angle of attack to really compress the ball for that crisp, pure contact.
- Mid Irons (7, 6, 5): Nudge the ball forward just a bit, maybe one or two ball-widths toward your lead foot. You can widen your stance slightly here, too, for a little more stability.
- Long Irons (4, 3): The ball moves forward again, ending up just inside your lead heel. This is where your stance will be at its widest, giving you a solid base for the more sweeping, powerful swing these clubs require.
To make this easier to remember on the course, here’s a quick cheat sheet.
Golf Iron Swing Setup at a Glance
This table is your quick-reference guide for getting the ball position and stance width dialed in for every iron in your bag.
| Iron Category | Ball Position | Stance Width | Key Feeling |
|---|---|---|---|
| Short Irons | Center of stance | Shoulder-width | On top of the ball |
| Mid Irons | 1-2 ball-widths forward of center | Slightly wider than shoulders | Balanced and stable |
| Long Irons | Just inside your lead heel | Widest stance | Sweeping the ball |
Keep this in mind, and you’ll avoid one of the most common setup mistakes out there.
The most common mistake I see is players using the same ball position for every iron. Adjusting it based on the club’s length is fundamental for making solid contact and controlling trajectory.
Finding an Athletic Posture
Finally, let’s get you into an athletic posture that’s ready for action. You want to bend from your hips, not your waist, until the sole of the club rests flat on the ground. Your arms should hang down naturally from your shoulders, not reaching, with just a little flex in your knees.
You should feel balanced and powerful, almost like a shortstop waiting for a grounder. This position creates the space you need for your arms to swing freely while your core and lower body power the rotation. This stable base is the true starting point for a correct iron swing.
Creating a Smooth and Synchronized Takeaway in Golf
Once you’ve nailed your setup, the very first move you make—the takeaway—sets the tone for the entire swing. A jerky, rushed, or disconnected start almost guarantees the rest of the swing will be a struggle to get back on track.
The secret is a smooth, unified motion where everything starts back together. You’ll hear coaches call this the “one-piece takeaway.” It should feel like your hands, arms, and torso are all moving as a single, connected unit. Instead of snatching the club away with just your hands, the real power comes from a gentle rotation of your upper body. This synchronization is the foundation of every consistent, powerful golf swing.
Getting the Feel for a Proper Takeaway
So, what does a good takeaway actually feel like? The first couple of feet are absolutely critical. As you start the backswing, you should feel the clubhead staying outside your hands. This is a huge checkpoint, and it’s where countless amateurs go wrong by whipping the club inside way too quickly, putting them on a terrible swing plane right from the start.
Picture a straight line extending back from your golf ball. For the first two or three feet of your swing, the clubhead should trace that line or even stay a little outside of it. This simple move does two things: it keeps the club in front of your body (so you don’t get stuck later) and it promotes a much wider swing arc, which is a major source of effortless power.
Here’s a great mental image I use with my students: Feel like you’re pushing the club away with your lead shoulder, not pulling it with your hands. This little thought forces you to engage your bigger muscles and keeps the takeaway wide and buttery smooth.
Setting the Golf Club on the Right Plane
As you continue this one-piece motion, your wrists will start to hinge naturally. This isn’t some abrupt, forced action. It’s a fluid move that gets the club onto the correct plane. Your goal here is to avoid the two most common faults: getting too steep (lifting the club almost straight up) or too flat (wrapping it way around your body).
When you do it right, the wrist hinge should feel like it sets the club parallel to your target line right when your lead arm gets parallel to the ground. This is the sweet spot—a powerful, loaded position at the top without any extra, unnecessary movements. At this point, you should feel balanced and totally ready to unleash on the downswing.
To groove this feeling, give the “club against the wall” drill a try. It provides instant feedback.
- Stand just a few inches from a wall, with the wall directly behind you.
- Take your normal golf setup.
- Now, make a slow, deliberate backswing.
- If your club bumps the wall early on, you’re swinging way too flat (inside).
- If you feel like you have to dramatically lift your arms to miss the wall, you’re probably getting too steep.
This drill is fantastic because it tells you immediately if you’re on the right track. By focusing on a synchronized start and letting your wrists hinge naturally, you’ll build a powerful and balanced position that sets the stage for a purely struck golf shot.
Unlocking Power in the Golf Downswing Sequence
This is where the magic happens in the golf swing. Most amateurs get this backward, thinking they need to pull the club down with their arms and hands. But if you watch the best iron players, you’ll see they generate incredible speed from the ground up. It’s not about brute strength; it’s about a smooth, efficient transfer of energy that starts with your lower body.
Forget about consciously hitting the ball. Your real goal is to compress it. The downswing kicks off with a subtle shift of pressure into your lead foot, followed immediately by your hips starting to rotate. This simple move creates powerful separation between your lower and upper body, storing up energy and creating that coveted lag—the secret sauce for that pure, flush feel at impact.
The Kinematic Sequence From the Ground Up in Golf
A powerful downswing is like a chain reaction. You can’t just fire everything at once; you have to let the momentum build naturally. The very first move is a small bump of the hips toward the target. This is the signal for your lower body to start unwinding.
Once your lower body starts rotating, it pulls everything else along for the ride: your torso, your arms, and finally, the club itself. When you lead with your hips, you almost guarantee the club will approach the ball from the inside—a non-negotiable for hitting a powerful draw or a dead-straight shot.
Of course, a strong core is the glue that holds this all together. Without it, the energy fizzles out before it ever reaches the club. If you feel like your sequence is breaking down, incorporating some specific golf core exercises can make a world of difference in how powerfully you can rotate through the ball.
Covering the Golf Ball for Pure Contact
There’s no better feeling in golf than that crisp “ball-then-turf” contact. The secret to achieving it is to feel like your chest is “covering the ball” right through impact. As your lower body rotates open toward the target, your upper body needs to stay tilted over the ball, holding that spine angle you set up at address.
This move is the antidote to the most common amateur fault: “standing up” or early extending through the shot. That’s what causes all those frustrating thin and topped shots. By keeping your chest down, you ensure you’re delivering a descending blow, which is exactly what you need to do with an iron.
This visual gives a great breakdown of the key positions in the backswing that set you up for a powerful release.
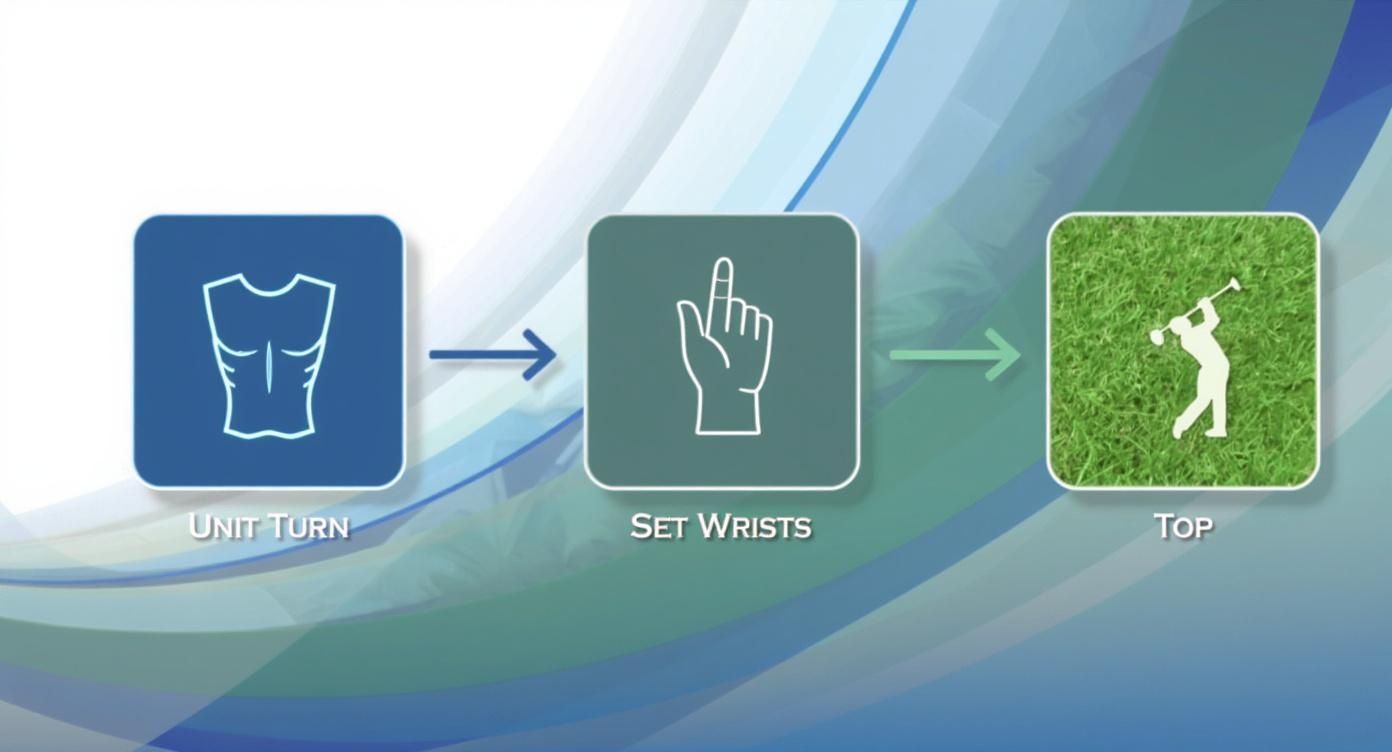
This flow—from a unified turn to setting the wrists and getting to the top—is all about loading up power that you can unleash efficiently on the way down.
Your hands should feel passive for as long as possible in the downswing. Let the rotation of your body bring the club down. The moment you try to force it with your hands, you lose lag, speed, and consistency.
Achieving Forward Shaft Lean in Golf
The true hallmark of an elite iron player is forward shaft lean at impact. All this means is that their hands are ahead of the clubhead when they make contact. This position delofts the clubface slightly, creating that powerful, penetrating ball flight and ensuring you compress the ball properly.
Here’s the thing: you can’t force this. It’s simply the natural result of a correctly sequenced downswing.
- Weight Shifts Forward: Your weight has to move to your lead side before your hands even think about starting down.
- Hips Rotate Open: Your hips clear out of the way, making room for your arms and the club to swing through freely.
- Hands Lead the Clubhead: Because your body is leading the charge, your hands will naturally get to the ball before the clubhead does.
The golf industry is booming, with the global golf equipment market valued at USD 8.2 billion and projected to hit USD 11.0 billion by 2033. A lot of that growth is fueled by golfers using tech like launch monitors to dial in these exact impact dynamics. You can check out more insights in the IMARC Group report. The good news is, once you understand the right sequence, you can create tour-level impact without needing all the expensive gear.
How to Diagnose and Fix Common Golf Iron Swing Flaws
We’ve all been there. You stripe a few good ones, and then, out of nowhere, your go-to miss shows up at the worst possible time. It’s easy to get frustrated, but every bad shot is just a piece of feedback—a clue telling you exactly what’s going wrong in your swing.
Instead of getting angry, start thinking like a detective. Understanding the root cause of a slice, a fat shot, or a thin shot is the first step toward a real, permanent fix. When you can diagnose the problem, you can apply the right drill and turn a frustrating range session into a productive one. You become your own best coach.
Conquering the Slice in Golf
Ah, the dreaded slice. It’s that weak, curving shot that robs you of distance and sends your ball into the trees on the next fairway. For right-handed golfers, it’s the ball that curves hard from left to right, and it’s easily the most common miss in the amateur game.
What causes it? A slice is the result of an open clubface at impact, an outside-to-in swing path, or—more often than not—a nasty combination of both.
The path is usually the main offender. So many golfers start their downswing by spinning their shoulders, throwing the club “over the top.” This creates a steep, cutting motion across the ball, imparting that sidespin that sends it soaring offline.
To fix this, try the “headcover under the arm” drill. It’s a classic for a reason.
- Take your normal setup.
- Tuck a headcover or a small towel under your lead armpit (that’s the left one for righties).
- Start making swings, focusing on keeping that headcover pinned against your body.
If the headcover drops, you know your lead arm is separating from your chest on the way down, which is a tell-tale sign of that over-the-top move. This drill forces you to keep everything connected, promoting a swing path that comes from the inside and lets you hit a powerful draw.
Eliminating the Fat Shot in Golf
Is there anything more demoralizing than taking a massive divot behind the ball and watching it dribble a few yards? Hitting it “fat” happens when the lowest point of your swing arc is behind the golf ball. The goal is to hit the ball first, then the turf.
The number one cause here is poor weight transfer. Amateurs often hang back on their trail foot through the downswing, almost trying to “scoop” or “lift” the ball into the air. This makes the club bottom out way too early, leading to that chunky, ground-first contact. A proper iron swing demands a decisive shift of weight and pressure onto your lead side.
To fix this, you have to get your weight moving forward. A great mental key is to feel like your belt buckle is pointing at the target before you even hit the ball. This simple thought encourages your lower body to lead the downswing, which automatically shifts your swing’s low point forward for that crisp, ball-then-turf contact we’re all chasing.
Fixing the Thin Shot in Golf
The opposite of the fat shot is the “thin” or “topped” shot. This is when the club strikes the top half of the ball, producing a low, screaming line drive that never gets airborne and usually runs right through the back of the green.
The most common reason for this is lifting your head and chest through impact. Golfers call this “early extension.” When you stand up and lose your posture, the entire arc of your swing rises. Suddenly, the bottom of your swing is too high, and you catch the ball on the upswing. The fix is learning to maintain your spine angle through the shot.
It’s no surprise that players are obsessed with fixing these issues. The global golf clubs and equipment market hit a staggering USD 7.68 billion, with North America accounting for over 40% of that. A huge chunk of that spending goes toward irons and high-tech swing analyzers designed to correct these exact faults, as detailed in this comprehensive market report.
Here’s a fantastic drill to help you stay down through the ball. Place a second golf ball about a foot in front of the ball you intend to hit. Your goal is simply to make your swing and have the clubhead brush the grass where that second ball is sitting. This forces you to extend through the shot toward the target, not up and out of your posture.
Even the best players in the world struggle with these common misses from time to time. The difference is that they know how to spot the issue and have a go-to drill to get back on track. This table breaks down the most common problems so you can start troubleshooting your own swing.
Common Golf Iron Faults and Their Fixes
| Common Fault | Likely Cause | Corrective Drill |
|---|---|---|
| The Slice | Outside-to-in swing path; open clubface | Headcover Under the Arm: Promotes a connected, inside-out path. |
| The Hook | Inside-to-out path is too extreme; closed clubface | Split-Hand Grip Drill: Helps feel proper clubface rotation and prevents flipping. |
| Fat Shots | Weight stays on the back foot; swing bottoms out too early | Feet-Together Drill: Forces you to stay centered and shift weight correctly to the lead side. |
| Thin Shots | Standing up through impact (early extension) | Ball-in-Front Drill: Encourages you to stay down and extend through the ball, not up. |
| Inconsistent Strike | Poor tempo and rhythm | “1-2-3” Swing Tempo Drill: Count “one” on the takeaway, “two” at the top, and “three” at impact to smooth out your rhythm. |
By identifying your miss and applying the right fix, you can stop guessing and start building a more reliable iron game. Use these drills to turn your weaknesses into strengths, one swing at a time.
Effective Drills to Ingrain a Better Golf Iron Swing
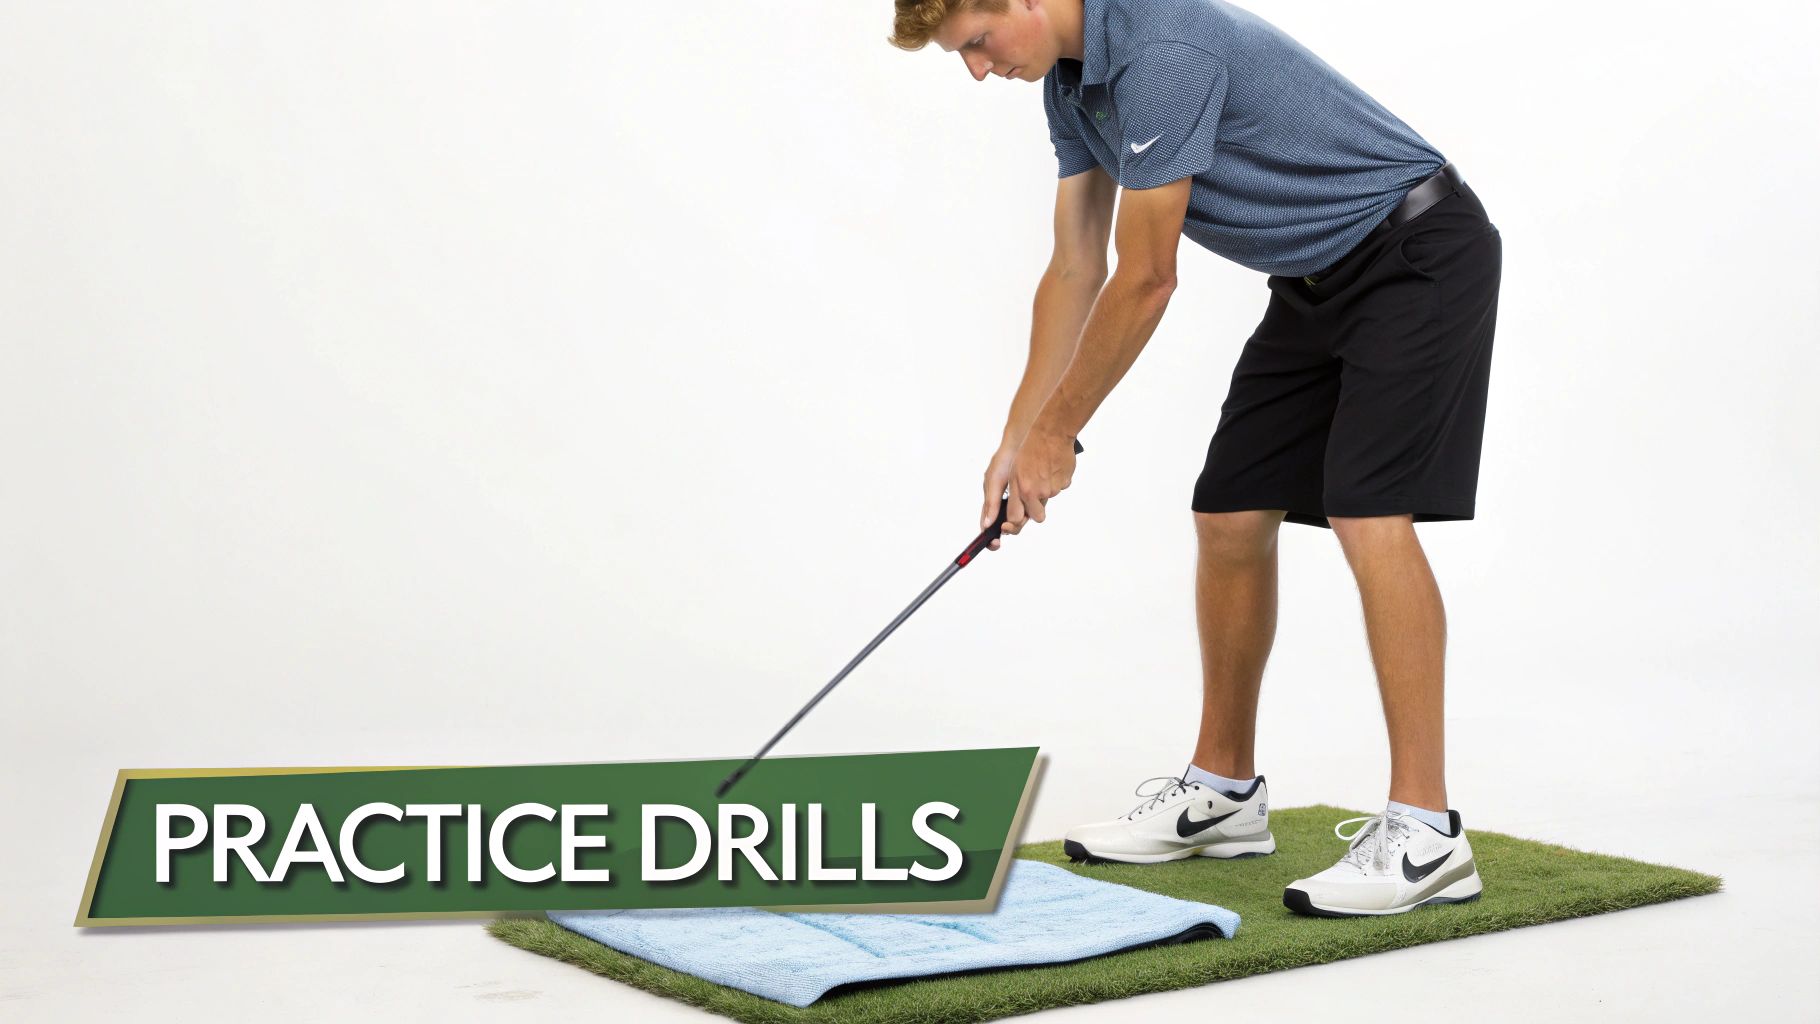
Knowing the theory behind a solid iron swing is one thing, but golf is all about feel. To make these moves second nature when you’re standing over the ball on the course, you have to burn them into your muscle memory. Drills are the essential bridge between understanding a concept and truly owning it in your swing.
This isn’t about mindlessly banging away at a bucket of balls. It’s about practicing with a specific purpose. Each drill here is built to isolate and fix a critical piece of your swing, turning those clunky, conscious thoughts into a smooth, subconscious action.
Drills for Connection and Feel in Golf
One of the biggest power leaks I see is when a golfer’s arms get disconnected from their body’s rotation. These drills are designed to sync everything up, creating an efficient motion that feels powerful without a lot of effort.
A classic for a reason is the towel drill. Just tuck a small towel under each armpit and make swings without letting either one drop. This forces your arms and torso to rotate together as a single, connected unit—just like we talked about in the takeaway. You’ll immediately feel the massive difference between an “armsy” swing and a connected, body-driven one.
Perfecting Impact Dynamics in Golf
The moment of truth in any golf swing is impact. Getting this right is what separates the great ball strikers from everyone else. A fantastic way to train this is with the simple but effective 9-to-3 drill.
Imagine a clock face. For this drill, your backswing only goes to the “9 o’clock” position (where your lead arm is parallel to the ground), and your follow-through finishes at “3 o’clock.”
The whole point here isn’t to hit the ball far, but to laser-focus on the quality of your impact. You’re chasing that crisp, ball-then-turf contact, making sure your hands are leading the clubhead through the hitting zone.
This compressed motion shines a spotlight on any flaws in your sequencing and builds the feeling of a proper descending blow. Honestly, it’s one of the best ways to train your body to achieve forward shaft lean without even thinking about it. Of course, perfect impact is useless if you’re aimed in the wrong direction, and you can explore more ways to groove your setup using these powerful golf alignment stick drills.
Another great drill for impact awareness is the split-hands drill. Take your normal grip, but then slide your trail hand about three inches down the shaft. This simple change exaggerates the feeling of clubface control and stops your wrists from getting too “flippy” through impact.
You’ll instantly feel how the lead hand should be controlling the clubface while the trail hand provides support and power. For anyone who struggles with nasty hooks or slices, this drill can be a real eye-opener.
FAQ’s
Even after you’ve got the fundamentals down, a few persistent questions always seem to pop up. Let’s tackle some of the ones I hear most often on the range to clear up any confusion and get your iron play dialed in. Getting these details right is what separates good shots from great ones.
How Do I Know if My Iron Swing Is Too Steep or Too Shallow?
Your divot is the ultimate truth-teller here. It gives you instant, unfiltered feedback on what your club is doing through impact.
Think of it this way: a deep, chunky divot that looks like a beaver pelt is a classic sign of a swing that’s too steep. This often leads to pulled shots or those weak, high slices that just float off to the right. On the flip side, if you’re just scraping the grass or taking no divot at all, your swing is probably too shallow. That’s a primary cause of thin shots and hooks.
A healthy, crisp divot should be about the size and shape of a dollar bill. Most importantly, it needs to start at or just after where the ball was sitting.
A great way to check this is to draw a line in the grass with a tee. Place the ball on the line. After your swing, the divot should always start on the target side of that line. If it’s starting behind it, you’re coming in too steep.
Should I Try to Hit Down on the Ball with My Irons?
Yes, but it should feel like a natural consequence of a good swing, not a violent, forced action. That “hitting down” sensation comes from a proper sequence: your weight shifts to your lead side, and your body rotates through the ball. This motion automatically shifts the bottom of your swing arc just in front of the ball.
Trying to consciously “hit down” often makes players get choppy and steep. Instead of that thought, try this one: “cover the ball with your chest.” It’s a much better swing thought that encourages you to maintain your posture and rotate through the shot, which naturally produces the descending blow you’re looking for.
What’s the Biggest Mistake Amateurs Make with Their Irons?
This one is easy. By far, the most common fault I see is golfers trying to “help” or “scoop” the ball into the air. So many players hang back on their trail foot and try to lift the ball with their hands, a move that absolutely kills any chance of solid contact and leads directly to thin and fat shots.
A solid iron swing is all about trusting the loft of the club to do the work. Your job is to strike down and through the ball, making sure your hands are ahead of the clubhead at the moment of impact. Always burn this simple but powerful rule into your brain: with irons, you must hit down to make the ball go up.
At Golf Inquirer, we believe a better swing is always within reach. We provide the tips, gear reviews, and inspiration to help you find more joy on the course. Explore our resources and let’s elevate your game together