
Let’s break this down. To stop slicing the golf ball for good, you have to fix two things: your open clubface at impact and your outside-to-in swing path. Most quick tips you find online only address one or the other, but any lasting fix comes from understanding how they conspire against you.
To effectively learn how to stop slicing the golf ball, consistent practice and attention to detail are crucial. Focus on the fundamentals of grip and swing mechanics to see improvement.
As you improve, the knowledge of how to stop slicing the golf ball will enhance your confidence and enjoyment of the game.
Once you get these two pieces of the puzzle sorted out, you’ll start hitting shots that fly straighter, go farther, and feel a whole lot better coming off the club.
Many golfers struggle with understanding how to stop slicing the golf ball, often leading to frustration on the course. Remember that learning takes time and patience.
Ultimately, understanding how to stop slicing the golf ball not only improves your game but also deepens your appreciation for golf.
Learning how to stop slicing the golf ball is essential for any golfer looking to improve their performance.
For those serious about mastering how to stop slicing the golf ball, a dedicated practice routine can lead to significant improvement.
Understanding Why You Slice the Golf Ball
That dreaded banana ball that curves helplessly into the trees isn’t a random mistake. It’s a direct result of simple physics. Before we can even think about how to stop slicing the golf ball, you have to know exactly what’s causing it in the first place.
Trying to fix a slice without knowing the “why” is like trying to fix a leaky pipe by just painting over the water stain on the ceiling. It might look better for a day, but the problem is still there.
The slice is born from a specific—and unfortunately common—combination of your clubface angle and swing path at the exact moment you hit the ball. Let’s break down the two main culprits.
The Open Clubface
The number one factor that determines which way your ball spins is the angle of your clubface at impact. Simple as that.
For a right-handed golfer, an “open” clubface just means it’s pointing to the right of your target line when it makes contact with the ball. This open face puts sidespin on the ball, which is what causes that dramatic left-to-right curve we all know and hate.
Think of it like trying to hit a topspin forehand in tennis but with the racquet face angled wide open. The ball is going to spin sideways every time. The same thing happens in golf, just with much more frustrating results that usually end up out of bounds.
Key Takeaway: Your clubface has the biggest say in how the ball spins. An open face at impact is the single biggest reason your ball is curving to the right.
The Outside-to-In Golf Swing Path
The second piece of the slice puzzle is your swing path—the direction your clubhead is traveling as it comes into the ball. The vast majority of slicers have what we call an outside-to-in swing path.
This means your club starts its downswing “outside” the target line (away from your body) and then cuts across the ball toward the “inside” of that line (closer to your body). You might have heard a pro call this an “over-the-top” move. It’s the exact same thing.
When you combine this outside-to-in path with that open clubface we just talked about, you create the perfect storm for a classic slice. The path starts the ball to the left of your target, and the open face makes it spin aggressively back to the right. This is why so many slicers watch their ball start out looking pretty good, only to see it take a sharp right turn into trouble. This move absolutely robs you of power and any chance of consistency.
Building a Slice-Proof Golf Grip

Your hands are your only connection to the golf club. Let that sink in for a second. If that connection is even slightly off, it sends the wrong signals down the shaft, and the clubface has no choice but to listen. This is why learning how to stop slicing the golf ball always begins with your grip.
A “weak” grip is the slice’s best friend. It almost guarantees the clubface will swing through the impact zone wide open. You can have a perfect backswing and a great transition, but a weak grip will sabotage the entire motion every single time.
The good news? Your grip is by far the easiest thing to fix. It doesn’t require a ton of athletic ability or hours on the range—just a little know-how and a few seconds of mindful setup before each shot.
Finding a Neutral Grip: The Golf Slice Killer
When we talk about “strong” and “weak” grips, we’re not talking about how hard you’re squeezing. It’s all about the rotation of your hands on the club. A weak grip is rotated too far toward the target (left for a right-handed player), while a strong grip is rotated too far away from it. Our goal is a powerful, neutral position right in the middle.
Let’s build it from the ground up.
Checkpoints for Your Lead Hand (Left Hand for Righties) in Golf
This is the hand that guides the club, so getting it right is non-negotiable.
- Place the club diagonally across the base of your fingers, not deep in your palm. The butt of the club should rest just below the heel pad of your hand.
- Once you close your hand, look down. You should be able to see at least two knuckles on the back of your hand. If you only see one (or none!), your grip is too weak and practically begging for a slice.
- The ‘V’ that forms between your thumb and index finger should point roughly toward your trail shoulder (your right shoulder for righties).
A weak grip is a primary cause of an open clubface at impact, a fact supported by extensive swing analysis. Data from GOLFTEC shows that approximately 60% of all golfers struggle with a slice, and higher-handicap players miss shots to the right over 50% of the time, directly linking poor grip mechanics to higher scores.
Adding The Trail Hand for Control in Golf
With your lead hand set, it’s time to bring in the trail hand (right hand for righties). This hand adds stability and support, but it should never overpower the swing.
You can place your trail hand in one of three common styles: the ten-finger (or baseball), the overlap, or the interlock. The choice is mostly personal preference, so go with what feels comfortable. The key is the positioning. The ‘V’ formed by your trail hand’s thumb and index finger should mirror your lead hand, also pointing toward your trail shoulder.
This creates a unified grip where both your palms are essentially facing each other. You want to feel like your hands are working together as a single unit, not fighting each other for control. A proper hold is fundamental, and you can get a more detailed breakdown by checking out our hand-by-hand guide to the golf grip.
Dialing in The Perfect Golf Grip Pressure
Finally, let’s talk about pressure. Countless amateur golfers who slice squeeze the club like they’re trying to wring water out of a towel. This tension is a swing killer—it completely prevents you from releasing the club and letting the face square up naturally through impact.
Think of it on a scale of 1 to 10, where 1 is barely holding on and 10 is a death grip. You want your pressure to be around a 4 or 5. Hold it firmly enough that the club won’t slip, but lightly enough that you can still feel the weight of the clubhead. This relaxed control is the final piece of building a slice-proof golf grip.
Golf: Creating the Right Setup and Alignment
So many golfers I see who slice have the same instinct: aim left and just “play the curve” back into the fairway. It feels logical, but it’s one of the most destructive habits you can develop. By aiming left, you’re basically green-lighting your body to swing even more across the ball, which just grooves that slice-causing outside-to-in swing path. It’s a vicious cycle.
Instead, let’s build a foundation. A proper setup and alignment aren’t about compensating for a bad shot; they’re about creating a pre-shot routine that makes a straight shot feel like the default outcome. This is where you can kill the slice before you even start your backswing.
Think of it as a proactive strike. Misalignment is a huge slice contributor. In fact, one study found that for 84% of golfers with a handicap of 20 or more, things like poor body alignment and an over-the-top swing are the main physical culprits. If you want to dive deeper, it’s worth exploring the common causes behind why golfers slice.

The Parallel Principle in Golf: Feet, Hips, and Shoulders
Picture a set of railroad tracks. One rail is your target line, running from the ball straight to your target. The other rail is your body line, and this is where your feet, hips, and shoulders need to be. Slicers almost always break this rule by opening their shoulders to the left of the target, which practically begs for an over-the-top swing.
Here’s a simple routine to nail this every single time:
- Start Behind the Ball: Stand a few feet directly behind your ball and pick an intermediate target. This could be a leaf, a small divot, or a patch of different-colored grass just a foot or two in front of your ball on the target line.
- Align the Clubface First: Walk up to your ball and set your clubface down so it’s aimed perfectly at that intermediate target. This is the most important step—get it right before you do anything else.
- Set Your Body Parallel: Now you can build your stance around that perfectly aimed clubface. Your feet, knees, hips, and shoulders should all be set up parallel to the target line, not pointing at the flag.
Pro Tip: When you’re at the range, lay two alignment sticks on the ground. Put one on your target line and the other parallel to it, right along the line of your toes. The visual feedback is priceless for retraining your eyes and body to understand what correct alignment actually feels like.
Golf Ball Position: A Simple but Critical Adjustment
Where the ball sits in your stance has a massive impact on whether you can make solid, square contact. A classic slicer’s mistake is playing the ball too far back in their stance. This simply doesn’t give the clubface enough time to rotate and square up by the time it reaches the ball, leaving it open at impact.
- For your driver: The ball absolutely needs to be positioned off the inside of your lead heel. This forward placement lets you catch the ball on the upswing and gives the clubface the maximum amount of time to close.
- For your irons: As your clubs get shorter, the ball should move back toward the center of your stance. A 7-iron is typically played from the middle, while a pitching wedge might be just a hair forward of center.
Correcting your ball position and making sure your body is truly parallel to your target are foundational changes. Mastering this setup is a huge leap forward in learning how to stop slicing the golf ball for good.
Mastering an Inside-Out Swing Path in Golf
If a weak grip and an open clubface are the slice’s fuel, the dreaded “over-the-top” move is the engine that drives it right into the trees. I see it all the time on the lesson tee. Golfers get to the top of their backswing and their very first move is to throw the club outward, away from their body, before cutting across the ball.
This common mistake is what we call an outside-to-in swing path. It’s a massive power leak and the number one reason your ball takes that ugly, sharp right turn (for a right-handed player).
To truly fix your slice, you have to retrain this motion. The goal is to groove an inside-out swing. This means the club approaches the ball from inside the target line and then travels out toward the target as you make contact. This is the path that produces powerful, straight shots and even the coveted draw.
This image really breaks down the key pieces of fixing your swing path and turning that slice into a pure strike.
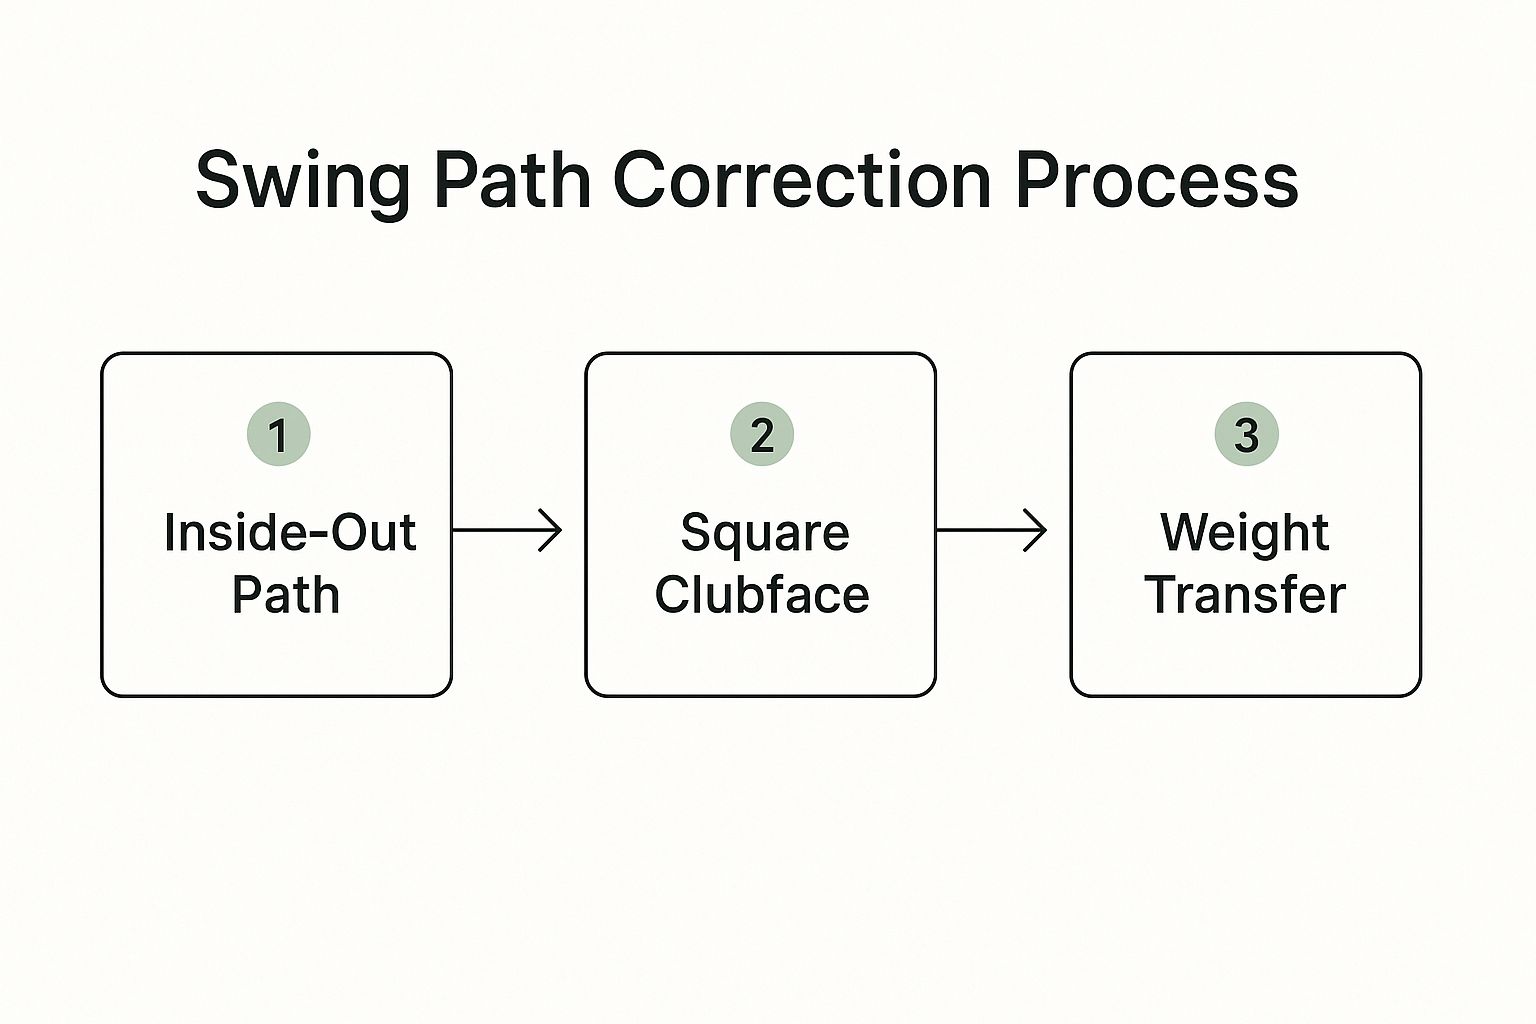
As you can see, getting the path right is the foundation. From there, you can dial in a square clubface and proper weight shift to really unleash some power.
Simple Golf Drills for Instant Feedback
The driving range is your laboratory for building this new feel. The good news is you don’t need any fancy gadgets—just a couple of things you probably already have in your bag to get immediate feedback on whether you’re coming over the top.
The Headcover Drill in Golf
This is a classic for a reason: it works.
- Pop your ball up on a tee.
- Grab an empty headcover (your driver’s is perfect) and set it on the ground about six inches outside of your ball and another six inches behind it.
- Your only job is to hit the golf ball without smacking the headcover. If you come over the top, you’ll clip that headcover every single time. This drill forces you to let the club drop into “the slot” and approach the ball from the inside.
The feeling you’re chasing here is allowing the club to drop slightly behind you as you start your downswing. I tell my students to slow down their transition from backswing to downswing. A less frantic move gives your arms the time they need to fall into that powerful inside position naturally.
The Two-Ball Drill in Golf
Here’s another great one that gives you unmistakable feedback.
- Set up to your ball like you normally would.
- Now, place a second golf ball about four inches directly outside your target ball.
- The goal is simple: hit only the target ball. Slicers who swing outside-in will almost always hit both balls because their club path cuts across them. To miss that outside ball, you have no choice but to swing from the inside.
Feel Versus Real in Golf
Be prepared for this to feel weird. When you first start working on an inside-out path, it might feel incredibly exaggerated, almost like you’re going to push the ball a mile to the right. That’s completely normal.
Your muscle memory has spent years, maybe decades, learning that the over-the-top move is the “right” way to swing. The correct path is going to feel totally alien at first. You have to trust the drills and the feedback they’re giving you.
These drills are fantastic for the range, but you can also work on the core movements at home. For more ideas on that, check out our guide on how to practice golf at home to keep making progress, even when you can’t get to the course. Consistent work on this path is the key to finally turning that weak slice into a powerful, reliable ball flight.
Developing Pro-Level Golf Clubface Control

Alright, you’ve dialed in your grip and you’re consistently swinging from the inside. That’s a massive win. But there’s one final piece to this puzzle if you want to know how to stop slicing the golf ball for good. Even with a perfect path, an open clubface at impact is still a one-way ticket to the right-side rough.
Mastering clubface control is what separates the golfers who just manage their slice from those who truly eliminate it. This is all about training your hands and wrists to square up that clubface without a single conscious thought. This is where you develop real, repeatable feel.
Golf: From Mechanical to Instinctive
So far, a lot of our focus has been on hitting specific mechanical checkpoints. Now it’s time to turn those mechanics into a feeling you can trust out on the course. The last thing you want is a mental checklist running through your head when you’re standing over a critical tee shot.
The goal here is to build an automatic release. It’s that effortless-looking move you see the pros make, where squaring the face just happens as their wrists correctly flex and rotate through the impact zone.
The Ultimate Goal: Move beyond thinking about how to fix your slice and start feeling how to hit a straight shot. True consistency is born when the right moves are baked into your muscle memory.
The Motorcycle Drill for Wrist Control in Golf
One of the best ways I’ve found to train this feeling is with the “Motorcycle Drill.” It’s a fantastic drill because it directly attacks a huge slice culprit: a cupped (or overextended) lead wrist at the top of the swing. When your wrist is in that position, it’s nearly impossible to close the face in time.
The drill is simple but incredibly powerful.
As you start your downswing from the top, you want to feel like you’re revving the throttle on a motorcycle with your lead hand. That single motion encourages your lead wrist to move out of extension and into flexion (a slight bow).
This isn’t just a gimmick. Modern swing analysis has shown that an overextended lead wrist is a key biomechanical cause of a slice because it delays the clubface from closing. By mimicking that ‘revving’ action, you learn to flex the wrist much earlier in the downswing. This is absolutely crucial for squaring the clubface and killing that nasty side spin. You can see more on how wrist action influences a push slice on hackmotion.com.
Here’s how to practice it:
- Take a slow-motion half-swing and pause at the top.
- Now, start the downswing by making that “motorcycle revving” move with your lead wrist.
- Pay attention to the clubface. You should feel it start to rotate toward square much, much earlier than before.
Start with small, slow swings, focusing only on this wrist action. Don’t worry about hitting the ball far. Once you get comfortable with the sensation, you can gradually build up your speed. This drill is a genuine game-changer for building an automatic, powerful release that finally turns that slice into a straight, penetrating ball flight.
FAQ’S
As you start tweaking your swing to finally get rid of that slice, you’re bound to run into a few head-scratchers. It happens to everyone. Think of it as part of the journey. To keep you moving in the right direction, here are some of the most common questions I get from golfers who are learning how to stop slicing the golf ball.
Why Do I Still Slice My Driver?
This one is incredibly common and, frankly, maddening. You finally get your irons flying straight, maybe even with a little draw, but the driver still wants to peel off to the right. Nine times out of ten, the culprit is your setup.
With the driver, the ball needs to be way up in your stance—just inside your lead heel. This position gives the clubface the absolute maximum time to rotate square by the time it reaches the ball.
You also need to add some spine tilt away from the target, so your lead shoulder feels higher than your trail shoulder. This simple adjustment encourages the upward angle of attack you need to launch the driver high and straight, and it’s a huge piece of the puzzle for killing a slice.
How Long Is This Going to Take?
Ah, the million-dollar question. There’s no magic number here. It really depends on how deeply ingrained your old habits are and how much focused practice you can put in. For some lucky golfers, a simple grip tweak is all it takes, and they see results almost immediately.
For others who have a severe over-the-top move, it might be a process of several weeks or even a couple of months of consistent work. The trick is to stop looking for an overnight fix and instead focus on small, incremental wins. Get excited about hitting three straight shots in a row on the range—that’s progress!
Pro Tip: Stop chasing the “perfect” swing you see on TV. Chase a better ball flight. Your goal is to build a functional and repeatable swing that produces the shot you want, not one that just looks pretty. You’re turning new feelings into reliable habits.
Great, Now I’m Hitting a Pull Hook. What Did I Do?
First of all, pop the champagne! Seriously, this is a huge win. It might feel like you’ve just traded one nightmare shot for another, but hitting a hook is actually fantastic news. It’s definitive proof that you’ve fixed your outside-in swing path and are now successfully swinging from the inside.
A pull hook—where the ball starts left and curves even more left (for a righty)—is usually the result of an inside-out path meeting a clubface that’s closing down way too fast. You’ve simply overcorrected.
Here’s how to dial it back into a gentle draw:
Soften Your Grip: Is your grip too strong? You might be seeing three or four knuckles on your lead hand. Try rotating your hands back toward a more neutral position. Seeing two knuckles is a great checkpoint.
Let Your Body Do the Work: You’re probably getting a little too “handsy” through impact. Feel like your body’s rotation is what squares the clubface, not an aggressive, wristy flick at the ball.
This is a much, much better problem to have. It is far easier to tone down a hook than it is to completely rebuild an over-the-top slice. You are absolutely on the right track.
At Golf Inquirer, we believe that truly understanding your swing is the first step toward playing your best golf. For more game-changing tips, honest gear reviews, and course guides to fuel your passion, visit us at https://golfinquirer.com.